

My task was to automate incoming e-mails that were stored in Dataverse, process them and register purchase orders and requests for quotes based on the information in the e-mail and attachments.
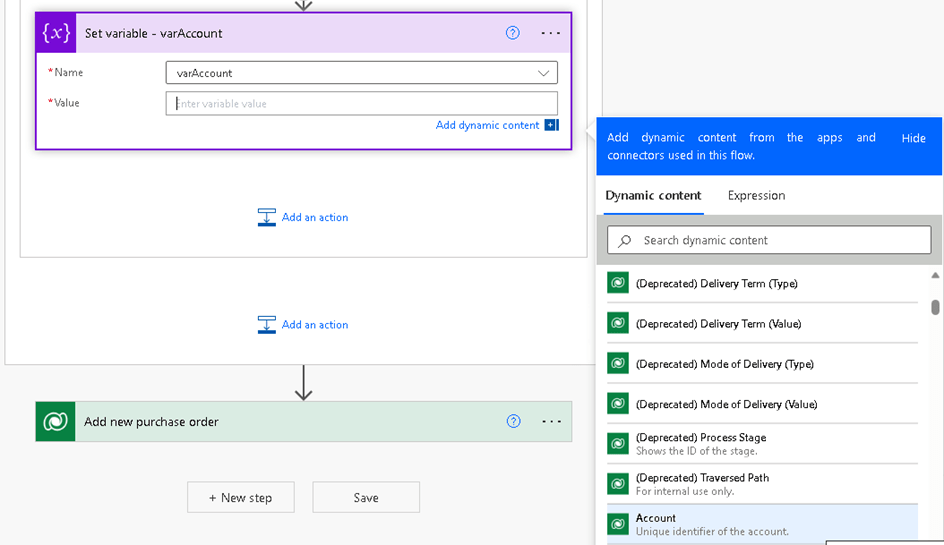
One of the tasks I had in my first flow connected to Dynamics CE was to create an order. Simple enough, I thought, and added the action Create a row from Dataverse and selected the table Purchase orders.
There I saw that several of the values to be entered had the format Value(Tablename). After some research I found that these were look-up columns to other tables. How was I supposed to get hold of these then? After some trial and error, I landed on the following procedure
I started with my Email Messages table and added a variable of type string.
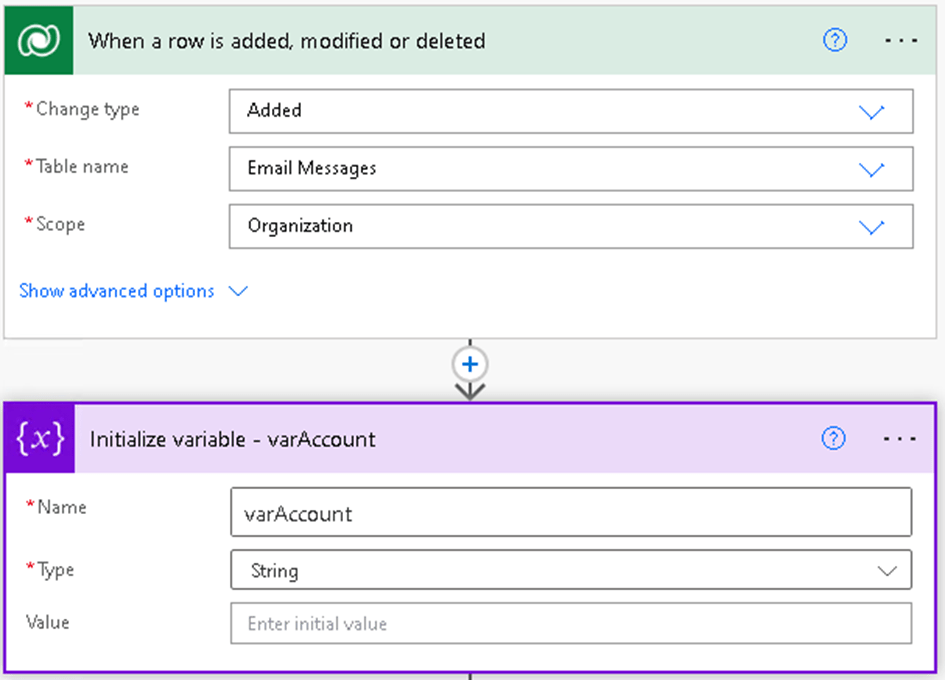
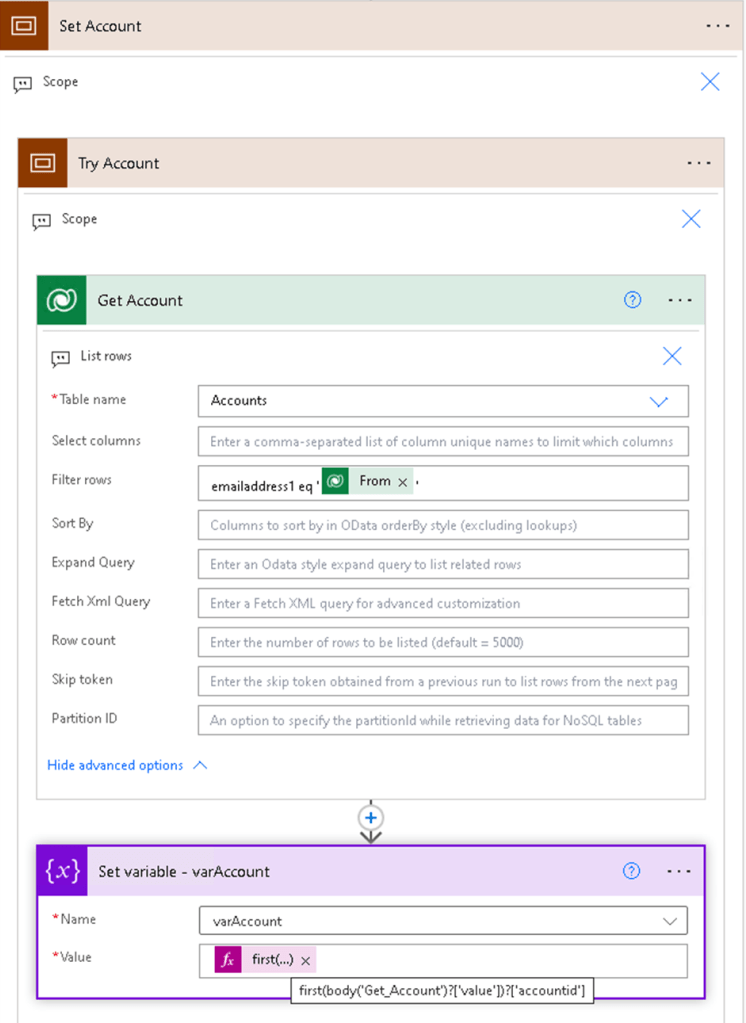
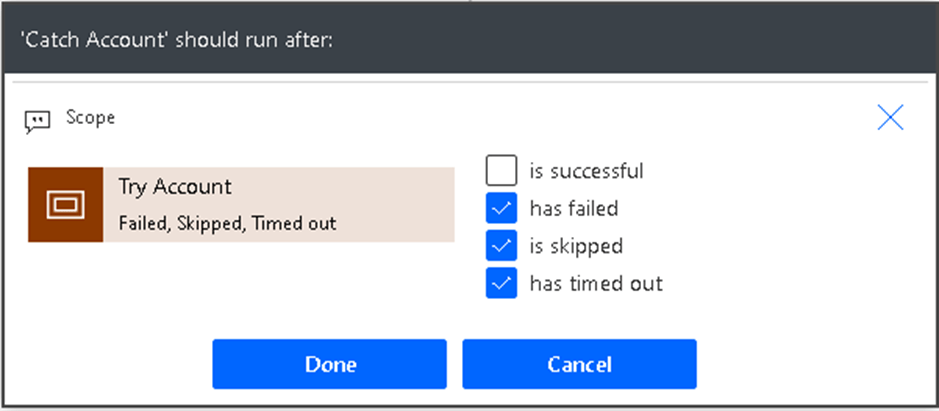
I like to have som order in my flows, and love the Scope actions. I created a Scope called Set Account and the Scopes Try Account and Catch Account inside it.
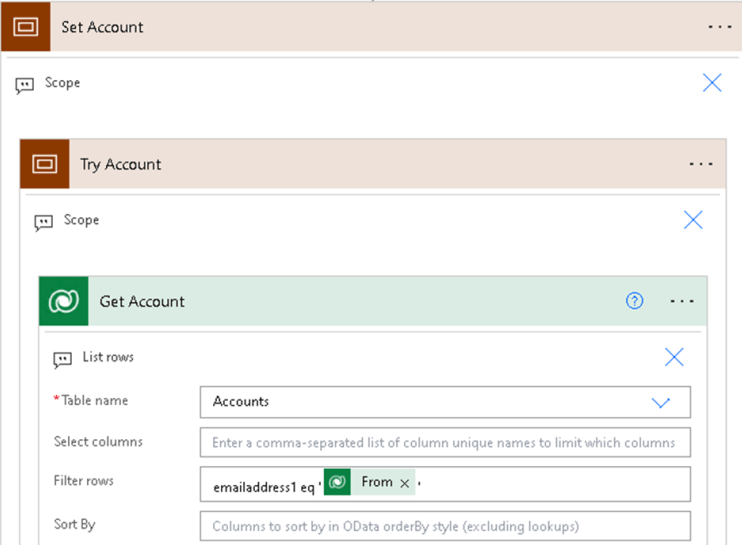
In the try block, I inserted the action List rows
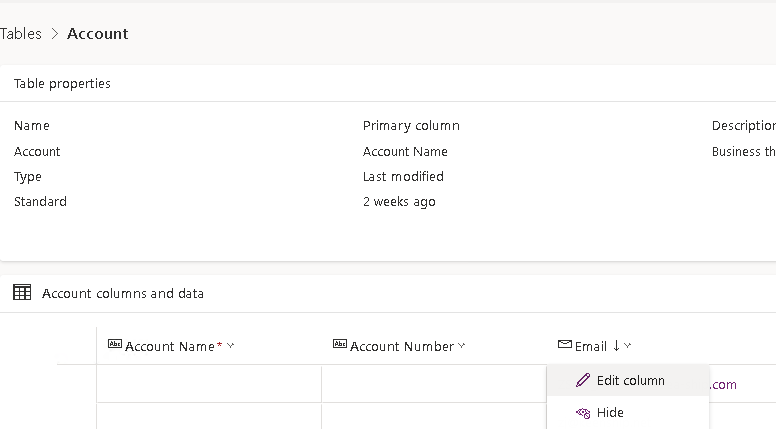
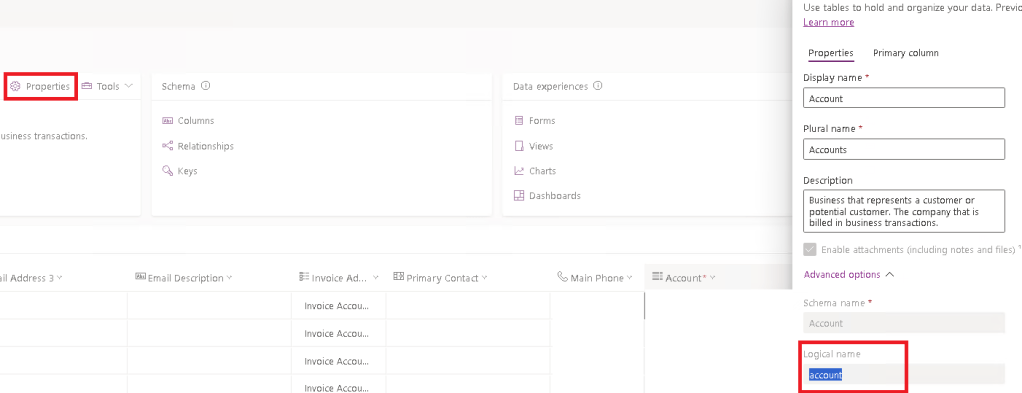
Before we can use the new action, we need to get the columnname from the look-up table. To do this, we need to open the table. In the left menu of Power Automate, click on “Tables” and find your look up table. In my example is is Account. If you view of columns don’t show the column you need, you can either add it or use the column schema to find it. When you do, click on edit.
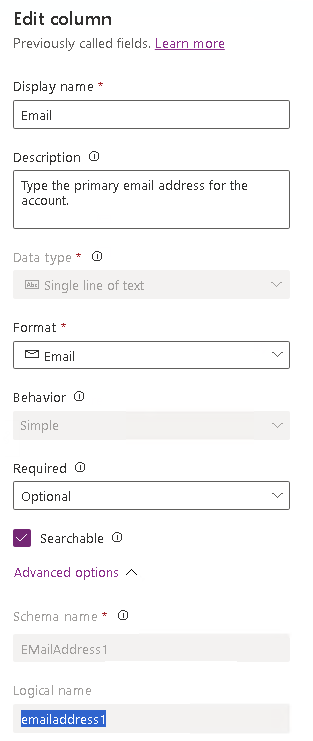
Expand Advanced options and copy Logical name.
Now you are ready to fill out the nesessary fields.
- Table name: Your look up table where you just found your column
- Filter rows: Copy the logical name of your column into Filter rows and use a logical operator based on what you want to achieve. In the example I filter on whether the column Email is equal to the sender of your flow.
Add the Set variable action to set my ID. I like to use variables and not paste the value right into the row because I want to catch it if it failes.
To find the uniq identifier in the Account table I look it up in the dropdown for the “Get account” and find the one where the text says Unique identifier of the account – thats the one we want.
I now have the column, but because I use List rows it is possible that it returns more than one element. I only want the first (because I know it is only one) and I dont like the “Apply to each” actions to mess up my code. Therefore I use the “first” command to get the accountid of the first element.
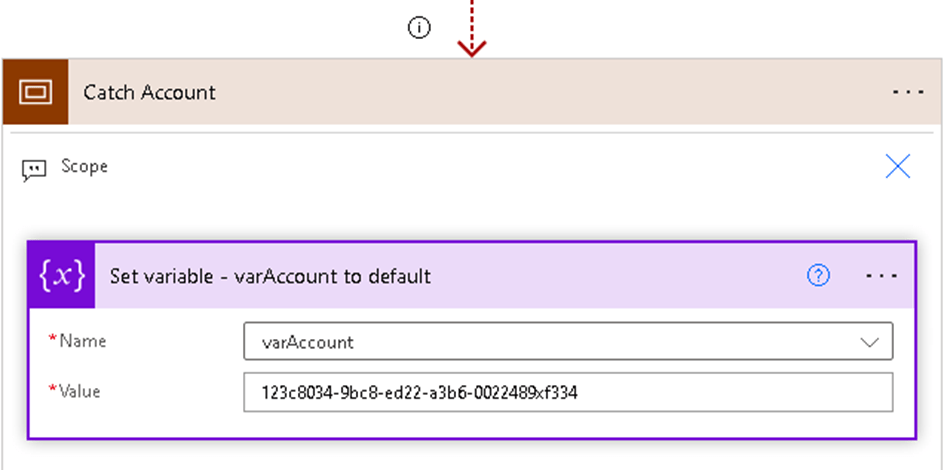
The Try block is ready, so we move over to the catch.
If the Try block fails, we want to catch it and do something else. In this case, I want to set a default dummy account as the account. I have copied the unique accountID and paste it right into the field og the variable.
We don’t want the catch block to run if the try block succeed. To configure that, click on the three dots up in the right corner and choose Configure after
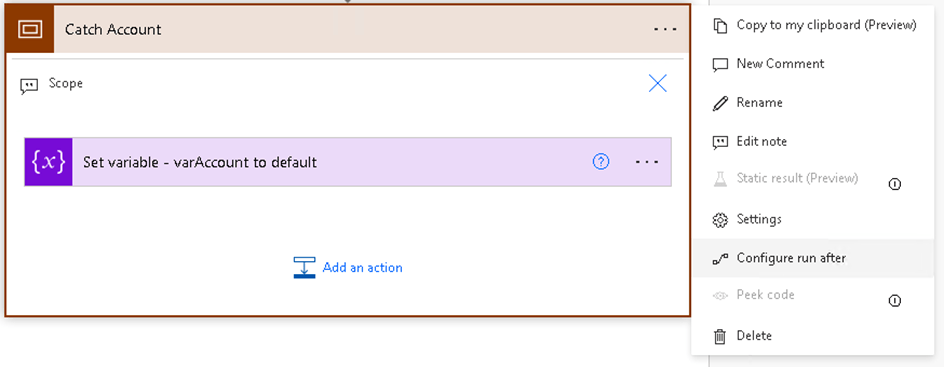
Check the boxes for has failed, is skipped and has timed out and click on Done. You will now see that a red, dotted line attaches the catch block to the try block.
You now need your tables logical name. If you go to your table view, select properties and look under Advanced properties, you’ll find it.
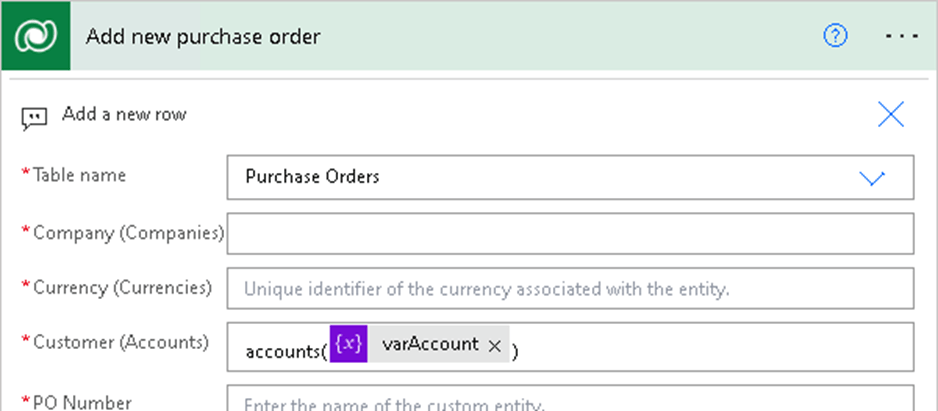
To add the action Add a new row and select the table where you want to add a row. In this case, it is the Purchase Orders. In the Customer column, you should input the plural form of your table’s logical name followed by your variable in brackets. It should be consistent with the accompanying text.
You have your first look up column in the box! For most of them, the process is the same, but for me one look up column was not found in the table’s columns. All I had was a URL to a JSON object where my column was hiding. My next article will be about that.

Leave a comment